This article includes various starter projects using Raspberry pi 0 w
If you are new to Raspberry Pi, you will first need to set up your Raspberry Pi
Check this tutorial for the same : The Complete Guide To Setup Your Raspberry Pi
Projects-
- LED Glow
- LED Blink
- Control LED with push button
- LED Chaser
- Change LED patterns using the button
We will use Python to code our Raspberry Pi
I am using Geany, you can use any text editor you like!
Click on the Raspberry Pi icon in top left —> Go to Programming —> Select your editor (Geany) to open as shown in the image below.
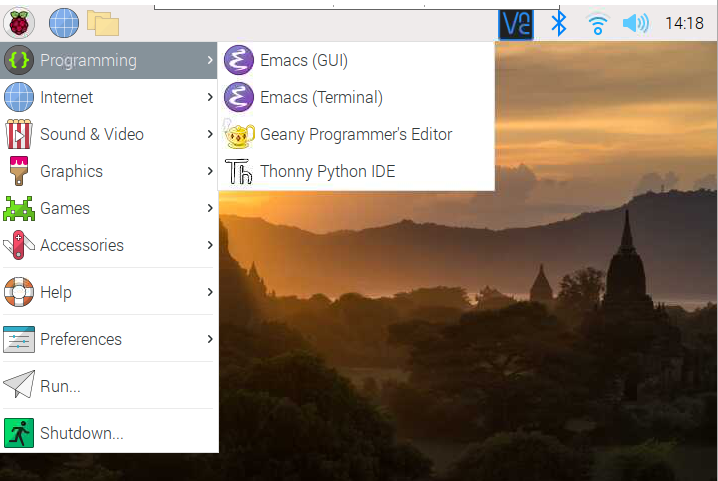
Create a new file and save it with .py extension
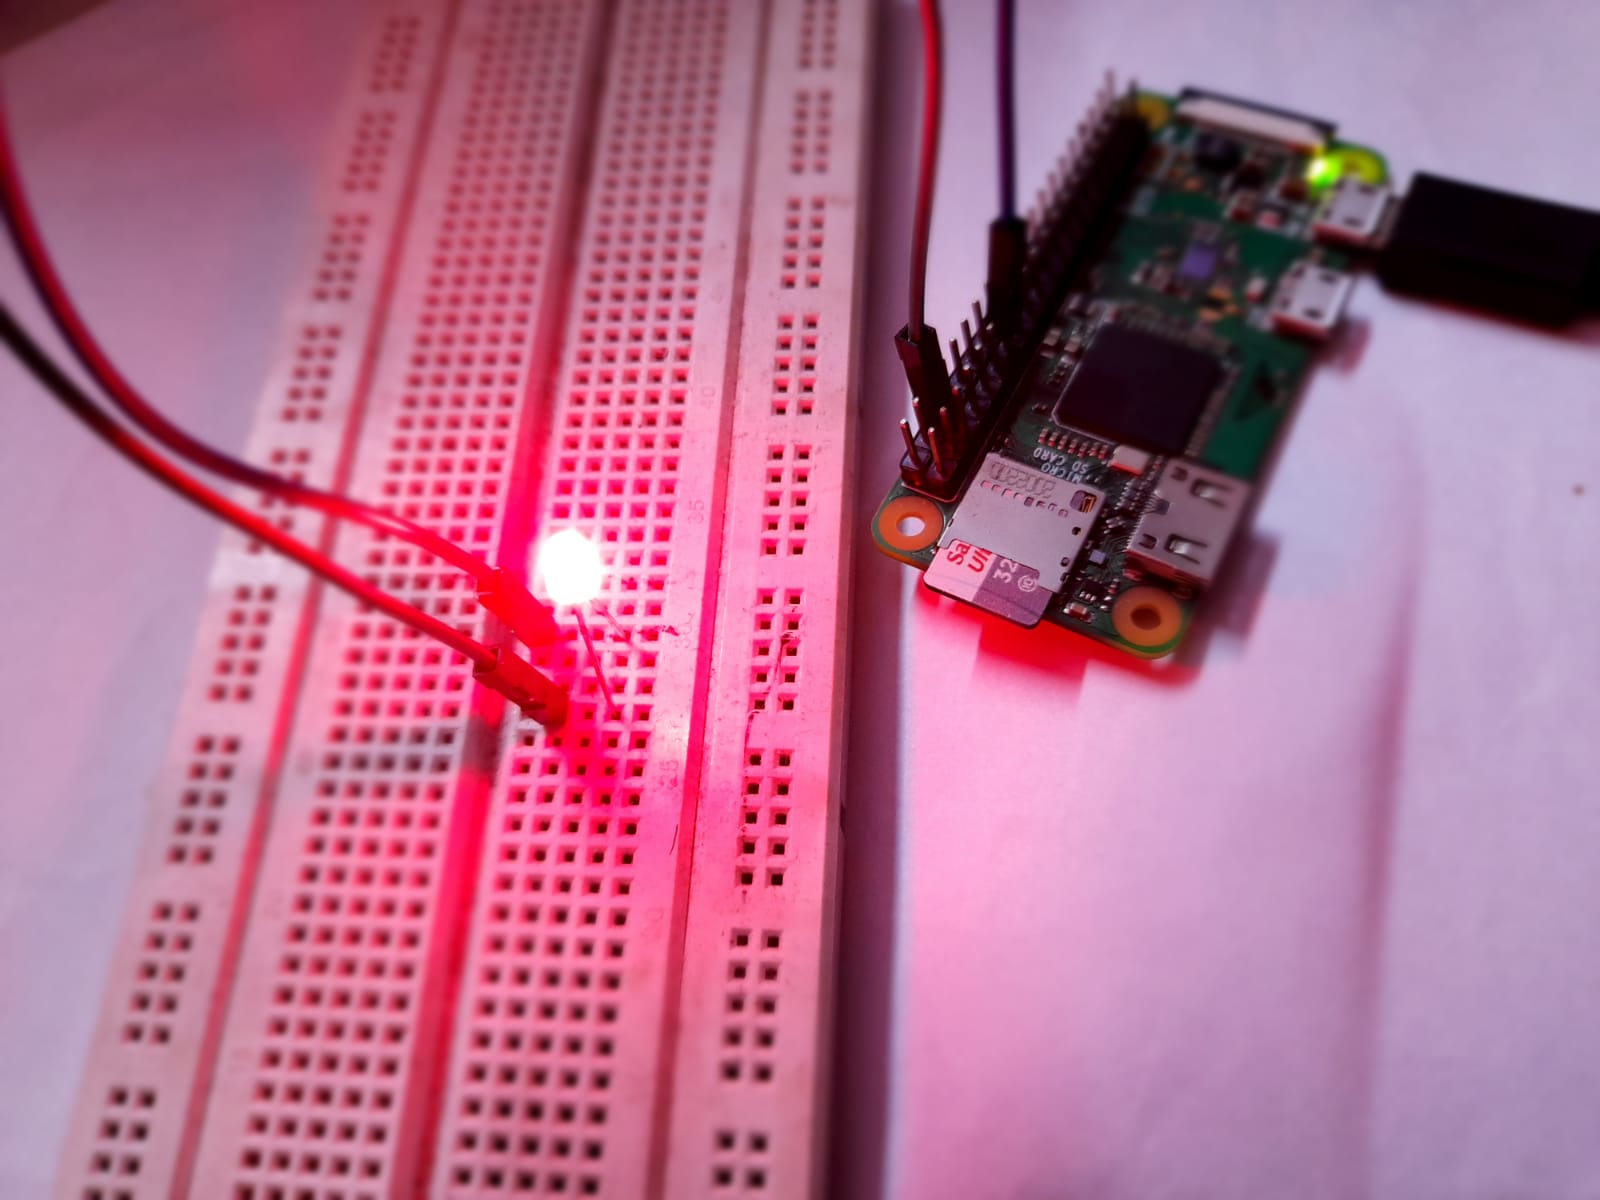
Now we shall start with glowing a LED using our Rasperry Pi
I am using Raspberry Pi 0 w, but this will work with any RPi model.
Let’s get started!
INITIAL NOTES
Now here are a few general notes which will be applicable for all the codes we write here :-
The code you write is case sensitive, which means GPIO and gpio have different meanings.
Initially, you need to import the RPi.GPIO library to access the GPIO pins of your RPi
Next we need to import time library, this will be required to give a time delay wherever required using time.sleep() function.
After this, we need to specify whether we will be using the BOARD Numbering of the RPi or the pin numbering by Broadcom. This will be done using gpio.setmode() function
If you wish to use the Board numbering then write gpio.setmode(gpio.BOARD)
And if you will use the numbering assigned by Broadcom, write gpio.setmode(gpio.BCM) instead.
Next, you need to mention whether the pin will be used as output or an input pin using gpio.setup() function
For example, if you are using a button, when you press it, the RPi will receive an input i.e either the button is pressed(High) or not pressed(Low), So in such cases, you will write
gpio.setup(13, gpio.IN) where 13 is the pin number (according to the mode selected) and gpio.IN denotes that the pin will work as input pin
And if you use a LED for example, it gives an output by either glowing or not glowing
So you will write gpio.setup(13, gpio.OUT) where 13 again denotes the pin used and gpio.OUT denotes that it will work as an output pin
These were a few lines of code you will need to write in every program.
Further functioning of each program will be discussed along with each one of them.
Before getting to the code lets have a quick view on
HOW TO UPLOAD CODE TO YOUR RASPBERRY PI-
Open your Terminal → move to the location where your file is saved (in my case a folder I created in Desktop) → now write “python3 abc.py”. Since I am using python3 so i mention this otherwise you may write python and abc is the name of the code file → Press Enter and its Done!
We will follow this along with the hardware circuit after every code we write!
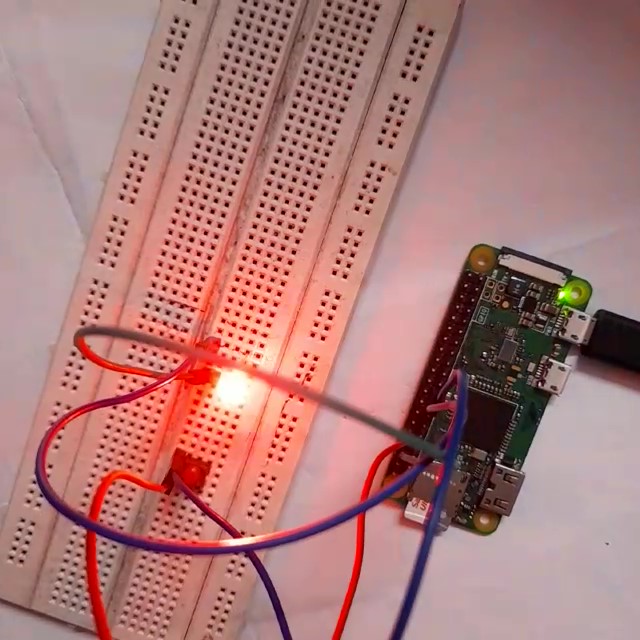
LED Glow
Code for making an LED glow continuously-
 import RPi.GPIO as gpio
 import time

 gpio.setmode(gpio.BOARD)
 led = 13
 gpio.setup(led,gpio.OUT)

 while True:
     gpio.output(led,gpio.HIGH)
Since while True is used, the loop will go on forever till it is not stopped externally through hardware or code.
Next we have our code to blink an LED continuously.
Here we use the time.sleep() function to give a 0.5 second delay, you can increase or decrease it as per your preference.
Remember, the number you mention inside this function will denotes number of seconds
So, LED will first glow then after 0.5 seconds it will turn off then again after 0.5 seconds it will turn on, and this will go on till the code is running in your RPi.
LED Blink–
 import RPi.GPIO as gpio
 import time

 gpio.setmode(gpio.BOARD)
 gpio.setup(15, gpio.OUT)

 while True:
     gpio.output(15,True)
     time.sleep(0.5)
     gpio.output(15,False)
time.sleep(0.5) 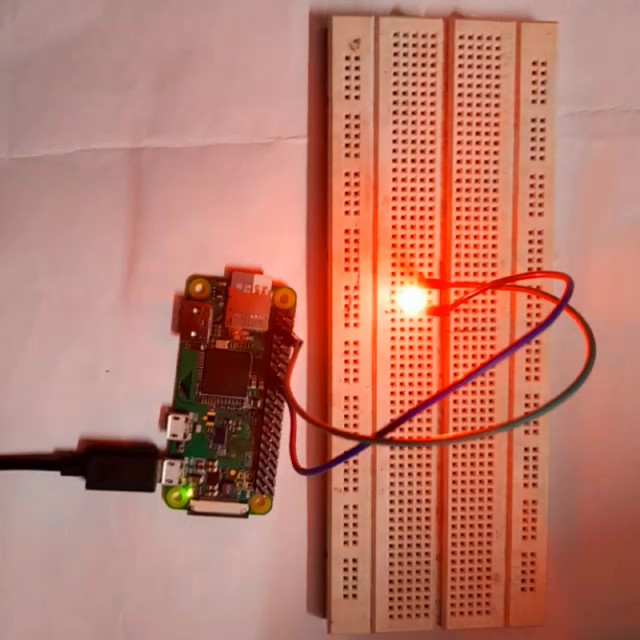
** Also NOTE, that since the code is written in Python language, the indentation plays a very important role.So make sure you do it correctly
Next we write the code for the case –
IF Button is pressed, LED will glow and if not, LED will Blink
Control LED with push-button
 import RPi.GPIO as gpio
 import time

 gpio.setmode(gpio.BOARD)

 gpio.setup(15, gpio.OUT)  #for LED
 gpio.setup(10, gpio.IN, pull_up_down=gpio.PUD_DOWN)  #for push-button

 while True:

   if (gpio.input(10) == True) :
     gpio.output(15, True)

   else:
     gpio.output(15,True)
     time.sleep(0.5)
     gpio.output(15,False)
     time.sleep(0.5)
Here, pull_up_down=gpio.PUD_DOWN is used to initially make the push-button in pull_down i.e low state as it can short at times just by touching.
Now it the code continuously checks for the current state of the button
If the button is pressed, then simply LED on pin number 15 is turned on and if the button is not pressed, the LED keeps blinking.
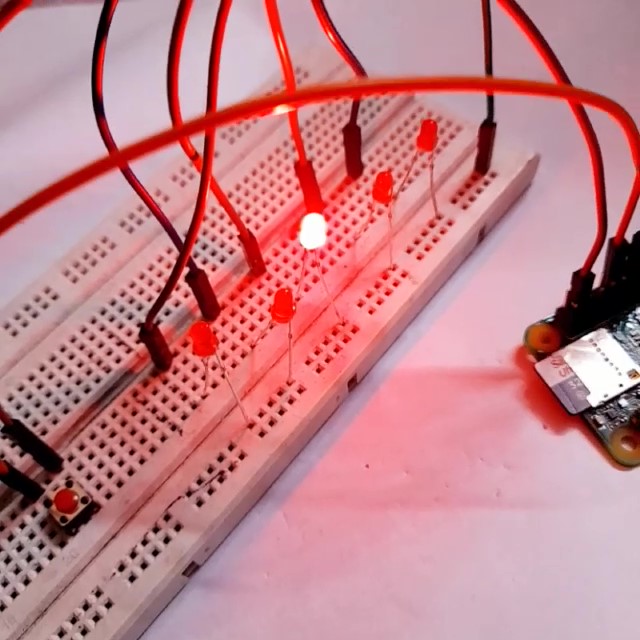
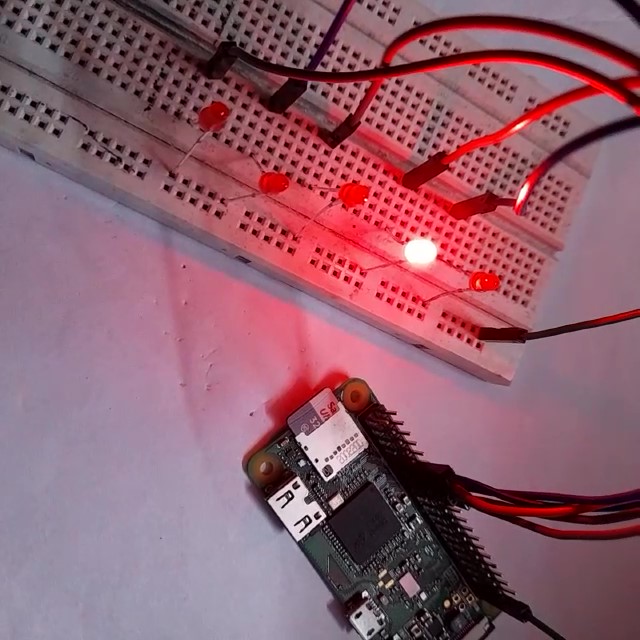
Next we make our LED Chaser–
The LEDs turn on and off one by one for a period of time and the cycle repeats giving the running light appearance.
 import RPi.GPIO as gpio
 import time

 gpio.setmode(gpio.BOARD)

 gpio.setup(11,gpio.OUT)
 gpio.setup(13,gpio.OUT)
 gpio.setup(15,gpio.OUT)
 gpio.setup(16,gpio.OUT)
 gpio.setup(18,gpio.OUT)

 def Glow(i):
   gpio.output(i,True)
   time.sleep(0.5)
   gpio.output(i,False)

while True:
   Glow(11)
   Glow(13)
   Glow(15)
   Glow(16)
   Glow(18)
Here, in the above code we have made a function Glow which is called with parameter as the Pin number on which various led’s are connected.
So at first, the led connected to pin number 11 will glow and then dim after 0.5 second and then the next led i.e connected to pin 13 of your RPi will behave in the same pattern and this will continue with each led and the pattern will repeat which will appear as running lights.
The last one for this article is to code for change in patterns on button press like in a diwali light
So initially a pattern will work and when the button is pressed, the pattern will change till the time it is pressed and then as soon as button is released it goes to its original pattern.
Now, if you use a push-button, you will have to hold the button continuously to see the second patter while of you use a switch, you can just toggle between the two positions.
LED Patterns
Code-
 import RPi.GPIO as gpio
 import time

 gpio.setmode(gpio.BOARD)

 gpio.setup(10,gpio.IN, pull_up_down = gpio.PUD_DOWN)
 gpio.setup(11,gpio.OUT)
 gpio.setup(13,gpio.OUT)
 gpio.setup(15,gpio.OUT)
 gpio.setup(16,gpio.OUT)
 gpio.setup(18,gpio.OUT)

 def Glow(i):

    gpio.output(i,True)
    time.sleep(0.5)
    gpio.output(i,False)

def Second(v1,v2):

   gpio.output(11,v1)
   gpio.output(13,v1)
   gpio.output(15,v2)
   gpio.output(16,v2)
   gpio.output(18,v1)
   time.sleep(1)

while True:

   if(gpio.input(10) == False):
       Glow(11)
       Glow(13)
       Glow(15)
       Glow(16)
       Glow(18)

  else:
      Second(True,False)
      Second(False,True)
In the above code, we have created two functions, namely Glow and Second. The Glow function is same as the Led chaser one which is basically our first patter which will turn up whenever the button isn’t pressed and when the button is pressed the Second function is called twice to give another pattern.