")
Before getting started with actually designing the form using HTML, let’s answer a few questions
What is HTML?
HTML stands for HyperText Markup Language which is used to create web pages
What is an HTML Form?
An HTML form is a simple form on a web page that allows users to enter data such as email address, name, phone number, etc or we can say it allows the admin to collect a user’s information and this information is further sent to the server for processing.
These forms are easy and useful to design ranging from a login form in some websites to query forms or exam assessment forms we see these days being extensively used for online examinations.
How will we design this form?
For this tutorial, we will be using HTML and Bootstrap to design responsive forms
What is Bootstrap?
Bootstrap is an easy-to-use front-end framework used for web development. It provides with easy to use editable components
Now, Let’s get started!
I am using Visual Studio Code, you can use any editor :)
Start with writing the basic format of HTML as shown below
 <!DOCTYPE html>
 <html lang="en">

 <head>
     <meta charset="UTF-8">
     <meta http-equiv="X-UA-Compatible" content="IE=edge">
     <meta name="viewport" content="width=device-width, initial-scale=1.0">
     <title>HTML Form</title>
 </head>

 <body>

 </body>

 </html>
Now to add Bootstrap to your project add the below code as shown
 <!DOCTYPE html>
 <html lang="en">

 <head>

     <meta charset="UTF-8">
     <meta http-equiv="X-UA-Compatible" content="IE=edge">
     <meta name="viewport" content="width=device-width, initial-scale=1.0">
     <title>HTML Form</title>

     <link href="https://cdn.jsdelivr.net/npm/bootstrap@5.0.0-beta2/dist/css/bootstrap.min.css" rel="stylesheet" integrity="sha384-BmbxuPwQa2lc/FVzBcNJ7UAyJxM6wuqIj61tLrc4wSX0szH/Ev+nYRRuWlolflfl" crossorigin="anonymous">

 </head>

 <body>

     <script src="https://cdn.jsdelivr.net/npm/bootstrap@5.0.0-beta2/dist/js/bootstrap.bundle.min.js" integrity="sha384-b5kHyXgcpbZJO/tY9Ul7kGkf1S0CWuKcCD38l8YkeH8z8QjE0GmW1gYU5S9FOnJ0" crossorigin="anonymous"></script>

 </body>

 </html>
Now, a form can contain various components ranging from a text box for user input, check boxes, dropdown, buttons and many more.
So we will go through all of them one by one
Start by opening the form tag and give a margin of 5 both horizontally and vertically
 <form class = “mx-5 my-5”>

 </form>
Now every component will be added inside this form
Add text box
  <div class="mb-3">

             <label for="name" class="form-label">Name</label>

             <input type="text" class="form-control" id="name">

    </div>
Add Email ID
         <div class="mb-3">

             <label for="email" class="form-label">Email ID</label>

             <input type="email" class="form-control" id="email">

         </div>
Add Password
 <div class="mb-3">

     <label for="InputPassword" class="form-label">Password</label>

     <input type="password" class="form-control" id="InputPassword">

   </div>
When you use type as password, the data you enter in the box be it number, text or any special character they won’t be visible to you while entering.
Add Phone number
         <div class="mb-3">

             <label for="number" class="form-label">Phone Number</label>

             <input type="number" class="form-control" id="number">

         </div>
Adding the type as number allows user to enter only digits in the box.
Dropdown/ Select Menu
 <select class="form-select mb-3">

             <option selected>Select an option</option>

             <option value="1">Option One</option>

             <option value="2">Option Two</option>

             <option value="3">Option Three</option>

</select> 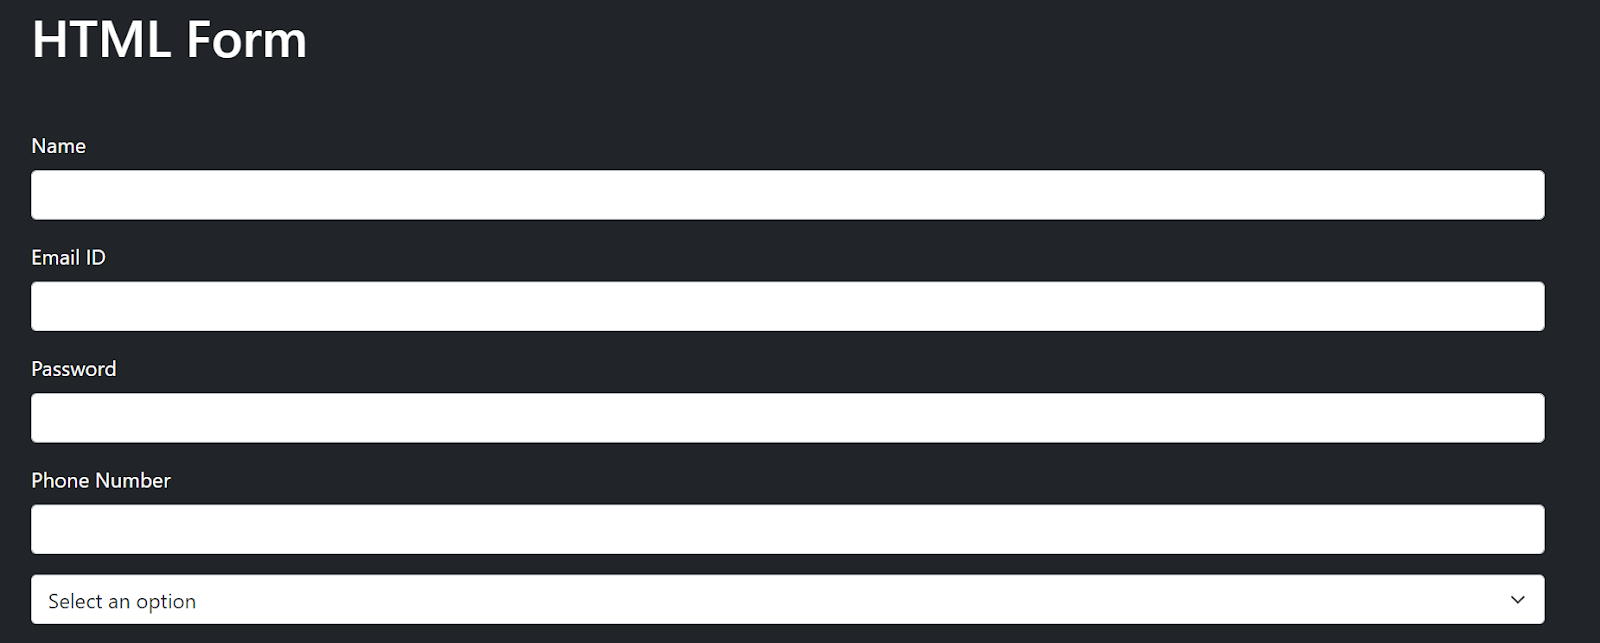
Radio Buttons
 <div class="form-check mb-3">

             <input class="form-check-input" type="radio" name="inputRadio" id="inputRadio">

             <label class="form-check-label" for="inputRadio">
                Radio Button
             </label>

   </div>
If you wish to add a Radio Button Checked by default, add checked to the input tag as shown-
   <div class="form-check mb-3">

             <input class="form-check-input" type="radio" name="RadioChecked" id="RadioChecked" checked>

             <label class="form-check-label" for="RadioChecked">
               checked radio
             </label>

     </div>
Switches
 <div class="form-check form-switch mb-3">

             <input class="form-check-input" type="checkbox" id="Switch">

             <label class="form-check-label" for="Switch">Switch</label>

  </div>
To add a by default checked switch, add checked to the input tag as shown below-
     <div class="form-check form-switch mb-3">

             <input class="form-check-input" type="checkbox" id="SwitchChecked"          checked>

             <label class="form-check-label" for="SwitchChecked">Checked switch</label>

     </div>
Inline Check Boxes
     <div class="form-check form-check-inline mb-3">

             <input class="form-check-input" type="checkbox" id="inlineCheckbox1" value="option1">

             <label class="form-check-label" for="inlineCheckbox1">1</label>

     </div>
     <div class="form-check form-check-inline mb-3">

             <input class="form-check-input" type="checkbox" id="inlineCheckbox2" value="option2">

             <label class="form-check-label" for="inlineCheckbox2">2</label>

      </div>
Inline Radio Boxes
 <div class="form-check form-check-inline mb-3">

             <input class="form-check-input" type="radio" id="inlineRadio1" value="option1">

             <label class="form-check-label" for="inlineRadio1">1</label>

  </div>
  <div class="form-check form-check-inline mb-3">

             <input class="form-check-input" type="radio" id="inlineRadio2" value="option2">

             <label class="form-check-label" for="inlineRadio2">2</label>

   </div>
Check Boxes
     <div class="form-check mb-3">

             <input class="form-check-input" type="checkbox" value="" id="CheckBox">

             <label class="form-check-label" for="CheckBox">
               checkbox
             </label>

      </div>
      <div class="form-check mb-3">

             <input class="form-check-input" type="checkbox" value="" id="Checked" checked>

             <label class="form-check-label" for="Checked">
               Checked checkbox
             </label>

    </div>
Range input
     <div class="mb-3">

             <label for="Range" class="form-label">Range</label>

             <input type="range" class="form-range" id="Range">

</div> 
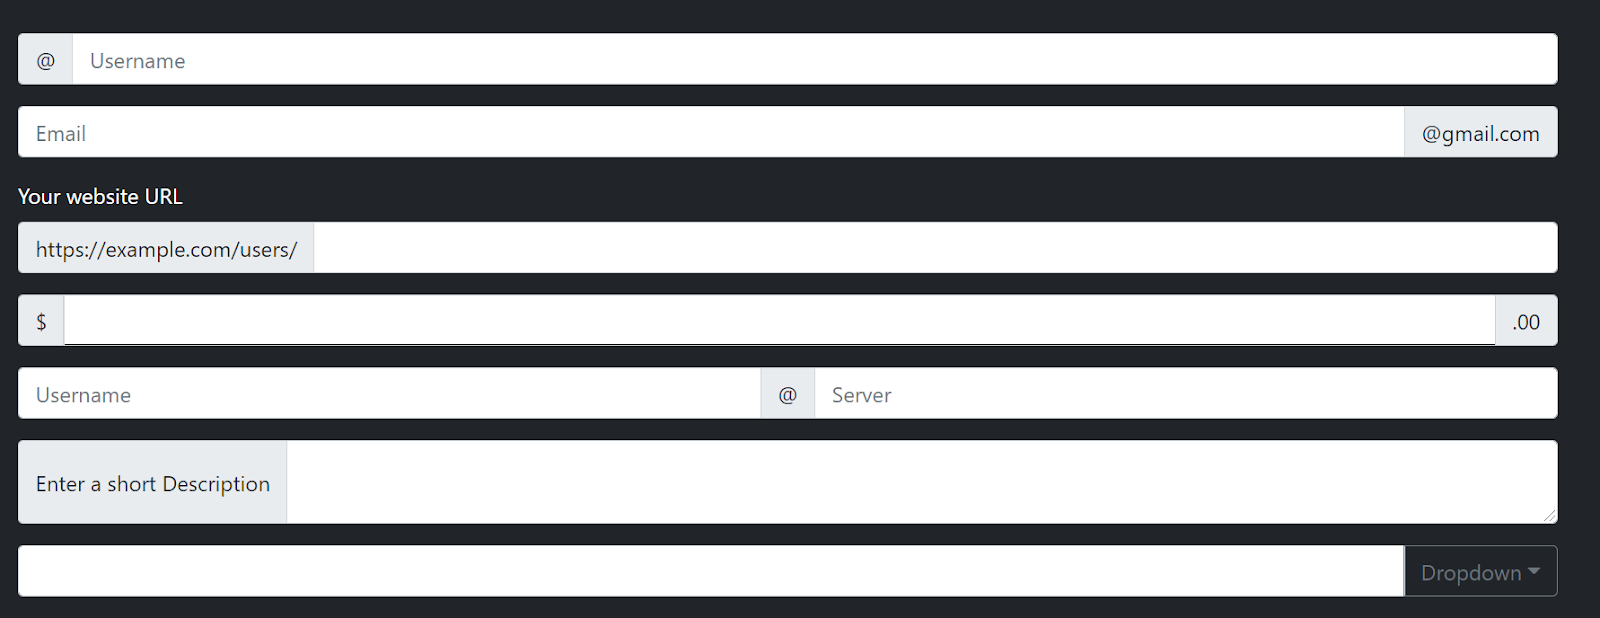
Input Groups
Here, we use the span tag along with input tag to get the @ and the text box for Username in the same line side by side
  <div class="input-group mb-3">

             <span class="input-group-text">@</span>

             <input type="text" class="form-control" placeholder="Username">

 </div>

  <div class="input-group mb-3">

         <input type="text" class="form-control" placeholder="Email">

         <span class="input-group-text">@gmail.com</span>

  </div>

    <label for="basic-url" class="form-label">Your website URL</label>

     <div class="input-group mb-3">

             <span class="input-group-text">https://example.com/users/</span>

             <input type="text" class="form-control" id="basic-url">

       </div>

       <div class="input-group mb-3">

             <span class="input-group-text">$</span>

             <input type="text" class="form-control">

             <span class="input-group-text">.00</span>

      </div>

      <div class="input-group mb-3">

             <input type="text" class="form-control" placeholder="Username" aria-label="Username">

             <span class="input-group-text">@</span>

             <input type="text" class="form-control" placeholder="Server">

      </div>
To add a text area for long texts-
         <div class="input-group mb-3">

             <span class="input-group-text">Enter a short Description</span>

             <textarea class="form-control" aria-label="With textarea"></textarea>

         </div>
To add a text box along with attached dropdown-
         <div class="input-group mb-3">

             <input type="text" class="form-control" aria-label="Text input with dropdown button">

             <button class="btn btn-outline-secondary dropdown-toggle" type="button" data-bs-toggle="dropdown" aria-expanded="false">Dropdown</button>

             <ul class="dropdown-menu dropdown-menu-end">

             <li><a class="dropdown-item" href="#">Action1</a></li>

             <li><a class="dropdown-item" href="#">Action2</a></li>

             <li><a class="dropdown-item" href="#">Action3</a></li>

             <li><hr class="dropdown-divider"></li>

             <li><a class="dropdown-item" href="#">Other</a></li>

             </ul>

       </div>
Here, in the dropdown menu you can even add links to other pages using the href in the anchor tag.
The hr tag with class dropdown-divider gives a horizontal bar between the upper the dropdown items and the lower one.
Comment Box
The size of comments by user’s can vary, so a textarea tag will be the best to use for comments.
         <div class="form-floating">

             <textarea class="form-control" placeholder="Leave a comment here" id="floatingTextarea2" style="height: 100px"></textarea>

             <label for="floatingTextarea2">Comments</label>

         </div>
Submit Button
         <div class="col-12">

             <button class="btn btn-primary" type="submit">Submit form</button>

</div> 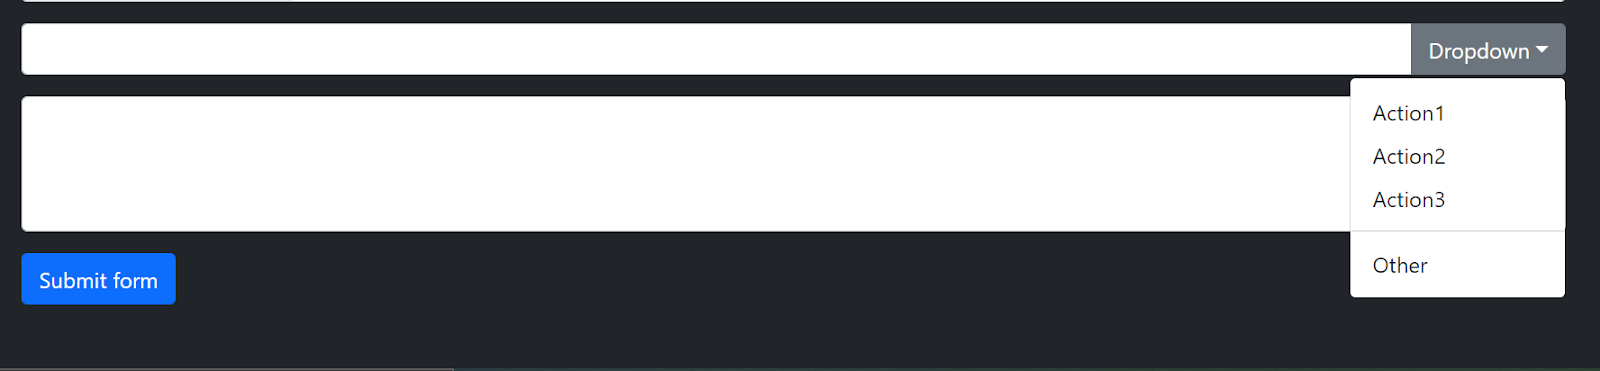
The complete form looks like below

You can use the h1 tag to give the heading HTML Form and to get a black background like in the above image, in the body tag add class bg-dark for a dark background and change the color of the text to white using text-white.